When an Allen-Bradley I/O module drops offline or throws a hard fault, the plant feels it immediately. Motors do not start, product counts go bad, and operators lose trust in the system. From a power and reliability perspective, an I/O fault is rarely just ŌĆ£one bad card.ŌĆØ It is a symptom at the intersection of power quality, wiring, environment, and hardware aging.
In this guide, written from a power-systems and reliability angle, I will walk through how to diagnose Allen-Bradley I/O module errors and, when the hardware really is at fault, how to replace the module without creating new problems. The focus is on ControlLogix and CompactLogix systems, with principles that carry over to SLC 500 and MicroLogix installations as well.
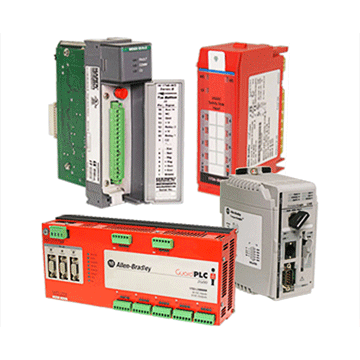
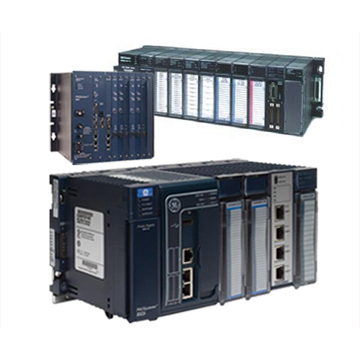
What Allen-Bradley I/O Modules Actually Do
Allen-Bradley PLCs such as ControlLogix, CompactLogix, SLC 500, and MicroLogix are industrial computers that execute control logic. I/O modules are the electrical bridge between that logic and the real world. Discrete input modules see devices like push buttons and limit switches as ON or OFF. Discrete output modules drive loads such as contactors, lamps, and solenoids. Analog modules read and generate continuous signals such as 4ŌĆō20 mA or 0ŌĆō10 V for pressure, temperature, or speed control.
Training material from PLC Department and RealPars emphasizes that most perceived ŌĆ£PLC problemsŌĆØ actually originate in the I/O layer and the field devices it connects to. According to RealPars, roughly three quarters of control-system failures trace back to sensors, actuators, and wiring, with only about a quarter in the I/O modules themselves and very few in the CPU or logic. That is why the first rule of responsible troubleshooting is to treat the PLC and program as innocent until the simplest electrical causes are proven.
When an Allen-Bradley system reports ŌĆ£I/O Not RespondingŌĆØ or a moduleŌĆÖs OK LED turns red, the controller is telling you that this bridge has failed somewhere. The fault might be a loose terminal, a dead power supply, misconfigured network addressing, or a genuinely failing module. Your job is to sort those possibilities in a structured way.

Typical Symptoms of Allen-Bradley I/O Module Errors
Across multiple sources, the same patterns appear when an I/O module is in trouble. Industrial Automation Co. notes that an ŌĆ£I/O Not RespondingŌĆØ alarm usually means the CPU has lost communication with one or more I/O modules. ACS Industrial and Global Electronic Services describe modules with flashing red OK or fault LEDs, intermittent or stuck inputs and outputs, and modules that disappear from the software configuration as clear signs of distress.
On the plant floor, these symptoms show up as motors that never receive a start command, analog values stuck at zero or full scale, safety circuits that refuse to reset, or nuisance trips where equipment appears to shut down ŌĆ£randomly.ŌĆØ In some cases, GES points out that modules run hotter than normal or show visible corrosion, cracked housings, or burnt areas on the PCB.
At the controller level, Rockwell-focused guides from HESCO and Electric Neutron report solid or flashing red LEDs on CompactLogix and ControlLogix processors when I/O faults escalate into controller major faults. Software tools such as Studio 5000 and RSLogix 5000 will show I/O error codes, red X icons on modules, or modules marked as ŌĆ£unrecognizedŌĆØ or ŌĆ£not responding.ŌĆØ
These symptoms are serious, but they do not automatically mean the module must be replaced. Before you pull hardware, you should understand what else commonly causes the same alarms.

Before You Blame the Module: Common Non-Hardware Causes
Communication and configuration issues
ACS Industrial highlights communication failures as a leading issue on Allen-Bradley ControlLogix systems, often caused by loose or damaged Ethernet cables, incorrectly seated rack modules, or a faulty Ethernet adapter. Industrial Automation Co. notes that an ŌĆ£Unrecognized Module in ChassisŌĆØ error frequently comes down to missing or incompatible firmware or an Electronic Data Sheet (EDS) that has not been installed for that module.
On more complex networks, Industrial Automation Co. and HESCO report that misconfigured IP addresses, duplicate addresses, wrong subnet masks, and overloaded network segments lead to lost communications with remote I/O or HMIs. SolidotechŌĆÖs CC-Link IE Field Basic example reinforces the same idea on another platform: remote I/O can go dark simply because refresh start addresses overlap local reserved addresses, even though the hardware is fine.
Misconfigured module properties in Studio 5000, wrong slot numbers, or unrealistic I/O update rates also show up repeatedly in Industrial Automation Co.ŌĆÖs ControlLogix I/O troubleshooting guidance. Before declaring a module bad, you should confirm that the configuration in the project exactly matches the physical hardware and that firmware and EDS files are aligned.
Power supply and grounding problems
From a power-systems perspective, I/O faults are often collateral damage from power problems. HESCO advises that when CPUs become unresponsive or show power-related error codes, you should measure terminal voltages with a multimeter, temporarily swap in a known-good power supply, and watch for excess heat or signs of capacitor aging. Industrial Automation Co. adds that overloaded or failing power supplies can cause widespread module and communication failures and recommends comparing aggregate I/O load to the power-supply capacity.
Electrical Engineering Portal describes another hidden enemy: poor grounding and ground loops. In analog systems especially, grounding a cable shield at both ends or having multiple ground paths can allow currents to circulate in the shield, distorting signals and triggering faults that masquerade as bad modules. Their guidance is to connect shields to ground at only one side, typically the PLC or analog input end, and to test for unintended ground paths with resistance measurements.
AmikongŌĆÖs case studies on I/O communication loss echo this. They recommend verifying I/O rack power around 24 V DC under load with a meter and ensuring the power supply is not undersized relative to the combined I/O and field device load. If the supply sags, modules can repeatedly reset and vanish from the bus, generating communication loss alarms that look like module failures.
Field wiring and device faults
Many sources agree that the majority of ŌĆ£I/O module problemsŌĆØ are actually in the wiring or field devices. RealPars shows how a simple blown fuse in a lamp circuit, a broken ground, or a miswired push button can make a perfectly healthy output module look bad. Electrical Engineering Portal recommends verifying that input voltages are within about ten to fifteen percent of the expected level and that outputs are receiving proper source power before you suspect the module.
Ddpartssolution stresses initial diagnosis on simple causes: verify power supplies and fuses, check connector tightness and cable integrity, and verify sensor and actuator operation with a multimeter or test jig. Amikong suggests current-based tests for digital inputs and outputs using an inline ammeter and a resistor around 1 k╬® as a safe dummy load. When a digital input has proper voltage but sinks zero current through the dummy load, that points to a failed module channel rather than faulty wiring.
Environmental and mechanical stress
Environmental factors quietly erode I/O reliability over time. CoreTigoŌĆÖs discussion of I/O module inefficiencies lists temperature extremes, high humidity, corrosion, vibration, and mechanical damage as recurring causes of failure. GES sees similar patterns in repair work: overheating modules, corroded contacts, cracked plastic, and damaged connectors are strong indicators that internal connections are compromised.
Ddpartssolution recommends keeping control panels within specified temperature and humidity ranges, minimizing dust and vibration, and using surge suppression on inductive loads. These are classic power-protection and reliability tasks that sit squarely in the realm of UPS, power supplies, and transient suppression hardware.

When Evidence Points to a Failing I/O Module
Once communication, configuration, power, and wiring have been systematically checked, you reach the point where the module itself becomes the prime suspect. Several sources describe the same telltale signs.
Ddpartssolution notes faulty I/O modules that present as multiple channels failing on one card, outputs stuck permanently ON or OFF, or consistent I/O-related fault flags in the diagnostics screen even after wiring and devices test good. HESCO recommends swapping a suspect module with a known-good spare of the same type and seeing whether the fault follows the module. If it does, that is strong evidence of a hardware failure.
GES frames the decision in terms of persistence and pattern. Intermittent signals that become more frequent, random fault codes that keep returning, recurring communication dropouts from the same module, and modules that run unusually hot or show visible damage all suggest aging or failing electronics. Industrial Automation Co. notes that flashing red LEDs on module OK indicators can signal critical hardware faults, and some of those codes are explicitly documented by Rockwell as unrecoverable except by replacing the module.
Rockwell AutomationŌĆÖs own user manual for ControlLogix 5580 controllers (publication 1756-UM058, summarized in the research notes) explains how front-panel RUN, OK, FORCE, and I/O status LEDs on controllers and 1756 I/O modules map to specific fault conditions. When those LED patterns and the Studio 5000 module status point consistently to a module fault, and you have ruled out the surrounding conditions, replacement becomes the appropriate next step.
Safety and Power Checks Before Touching Hardware
Before you loosen a single terminal screw, you should think in terms of energy, not code.
Control.comŌĆÖs best-practice synthesis and ddpartssolutionŌĆÖs replacement guide both stress lockout/tagout and safe state. Machines must be brought to a condition where unexpected energization of outputs will not endanger people or damage equipment. Electrical Engineering Portal warns that some outputs may energize unexpectedly when modules are replaced or tested, especially if logic forces or automatic restart conditions are present.
From a power-systems viewpoint, you should verify the following before working in the panel. Confirm the incoming control power is de-energized where required, and prove absence of voltage at the module terminals with a meter rather than assumptions. Understand whether the specific Allen-Bradley platform in front of you supports hot-swapping I/O. Electric Neutron notes that ControlLogix systems support hot-swap I/O for higher availability, but even then, manufacturer procedures must be followed, and you must be confident that removing power from that module will not compromise a safety function.
HESCOŌĆÖs troubleshooting guidance also encourages checking the health of the I/O power supplies before you blame a module. Measure the supply voltage under load, ensure it falls within the expected range, and feel for abnormal heating on the supply and module. PLC Department recommends verifying the PLC power supply module, any UPS or battery backups in the control circuit, and all power-related terminals and connectors for damage or loose connections.
Finally, ddpartssolution recommends ESD precautions when handling I/O modules. These are sensitive electronic assemblies, and static discharges can turn a marginal module into a dead one during removal or installation.

Diagnostic Workflow: Proving the Module Is Really Bad
Read LEDs and diagnostics in Studio 5000 or RSLogix
A disciplined workflow starts with what the system is already telling you. Industrial Automation Co. describes the status LEDs on ControlLogix I/O modules as primary diagnostics: a green OK LED indicates normal operation, while red or flashing OK, I/O, or Network Status LEDs indicate module or communication faults. Electrical Engineering Portal explains that input modules typically have both power and logic LEDs; if the field-device power LED is on but the logic LED and image table bit never change, the module may not be transferring the signal correctly.
Studio 5000 Logix Designer and RSLogix 5000 are your window into the controllerŌĆÖs view of the hardware. ACS Industrial and HESCO both emphasize using these tools to inspect Module Properties, fault logs, and live tags. Features such as trend charts, custom data monitors, and program compare can help you see whether an input bit truly never changes or whether a module is dropping in and out of the backplane.
For legacy SLC 500 and MicroLogix systems, RSLogix 500 and the controllerŌĆÖs internal status files show I/O fault codes. PDFsupply describes SLC 500 error codes that encode the slot number and fault type; codes that indicate ŌĆ£missing moduleŌĆØ or ŌĆ£undetected moduleŌĆØ suggest configuration or seating issues, while repeated module-specific errors after reseating and configuration checks point toward hardware failure.
Verify rack and field power
Once you understand the logical symptoms, move to the power rails. Control.com and RealPars both insist that verifying power supplies and grounding is an early step. Measure the control supply feeding the I/O modules, such as a nominal 24 V DC bus, under real load conditions. Amikong recommends confirming that this voltage is within the specified range and does not dip when I/O channels switch. Electrical Engineering Portal adds that on AC-powered output modules you should see about plus or minus ten percent of the rated voltage at the module input; low readings implicate the source supply, not the module.
At the same time, look for signs of excessive load. HESCO suggests calculating the total current drawn by all I/O modules and field devices against the rated capacity of the power supply. Industrial Automation Co. notes that occasionally the total load creeps beyond the supplyŌĆÖs limit as additional modules and field devices are added over time, leading to intermittent module resets and communication dropouts.
Grounding should be checked not just for continuity but for topology. Electrical Engineering PortalŌĆÖs discussion of ground loops is particularly important for analog I/O systems. If cable shields are grounded at both the PLC panel and the field device, you may measure unintended currents flowing in the shield, which can distort readings and trigger what look like analog module faults. Breaking the loop by grounding at only one end is a proven mitigation.
Test inputs and outputs electrically
With power known good, you can test how each channel behaves. RealParsŌĆÖ step-by-step digital I/O troubleshooting process provides a solid model. For a suspect input, compare three things: the status LED on the module channel, the state of the corresponding bit in the PLC tag or data table, and the voltage at the field terminal using a digital multimeter.
If voltage is present at the module terminal and within tolerance, but the channel LED and internal tag never show ON, Electrical Engineering Portal advises suspecting a faulty input channel, possibly due to a failed opto-isolator. If voltage at the terminal is low or absent, work backward toward the field device. In RealParsŌĆÖ examples, that means measuring at the sensor, checking fuses, and confirming that the 24 V DC supply feeding the field device is healthy.
For outputs, the same sources recommend correlating the commanded state in the logic, the output channel LED, and the voltage at the terminal. RealPars describes a classic case of a sourcing output module driving a lamp through a fuse. When the output LED is ON but the lamp is dark, the first measurement should be between the module output and the downstream side of the fuse. Zero volts suggests the fuse is open. A healthy voltage there shifts suspicion to the lamp, wiring, or grounding.
Amikong extends this idea by recommending current-based tests using a safe dummy load such as a 1 k╬® resistor. For a 24 V DC output, a healthy channel should deliver on the order of tens of milliamps through the resistor when turned on. A reading of zero milliamps with proper supply voltage at the module suggests internal failure of that output channel.
Use swap tests to isolate the module
Even with careful measurements, it is wise to use isolation techniques before condemning an entire module. Ddpartssolution advocates moving the suspect signal from its original channel to a known-good channel on the same module or on a different module, when the platform allows. If the problem follows the signalŌĆÖs wiring and device regardless of which channel you use, the wiring or device is at fault. If the problem stays with the original channel or module, even when a known-good device is connected, you have strong evidence of a module-level problem.
HESCO suggests swapping the entire module with a spare of the same catalog number in the same slot. If the new module behaves correctly under identical wiring and configuration, the old one can be considered failed hardware. In many ControlLogix systems, this swap can be done during a planned stop, with the PLC in Program mode, to avoid surprises.

Replacing an Allen-Bradley I/O Module the Right Way
Plan and document the existing configuration
Before you remove anything, capture how the system currently looks. Ddpartssolution recommends documenting module part numbers, firmware or catalog details, slot positions, and terminal wiring. This can be as simple as photos plus written notes, but for critical systems, a structured asset list is better.
Backing up the PLC program and hardware configuration is equally important. HESCO and PLC Department both stress maintaining regular backups so that a failed CPU or module does not mean lost code. For Rockwell systems, that means saving the Studio 5000 or RSLogix project and, when available, using tools like Rockwell AssetCentre to maintain versioned backups across multiple controllers.
Removal: getting the bad module out safely
Once the system is documented and safely prepared, follow the removal sequence that ddpartssolution outlines. Put the controller in Program or Maintenance mode and stop the affected process. If the platform does not explicitly support hot-swap for that module type, de-energize the I/O rack power and verify absence of voltage.
Disconnect or remove plug-in terminal blocks while labeling wires clearly if they are not pre-keyed. Many Allen-Bradley I/O modules use removable terminal blocks that can remain wired while the module itself is changed, which reduces wiring errors. Use ESD precautions while handling the module and avoid flexing the PCB or connectors.
PDFSupplyŌĆÖs discussion of SLC 500 I/O faults also reminds technicians to use the manufacturerŌĆÖs mechanical locking features, such as self-locking tabs, when sliding modules in or out of a chassis. Remove modules straight out without twisting, and ensure that no bent pins or deformed backplane connectors are left behind.
Installing the replacement and restoring configuration
For the replacement, DdpartssolutionŌĆÖs advice is clear: use an identical or fully compatible module. That means matching the Allen-Bradley catalog number and, where relevant, the series and firmware revision that the controller project expects. Industrial Automation Co. notes that mismatched modules often show up as ŌĆ£Unrecognized Module in ChassisŌĆØ until the correct EDS file or firmware support is in place.
Insert the new module into the same slot, making sure it is fully seated and latched. Reconnect the terminal block or re-terminate field wiring, verifying that each wire is on the correct terminal. Good panel labeling pays off here; Electrical Engineering Portal repeatedly emphasizes the value of well-documented I/O lists and labeled terminals for rapid, error-free work.
Once hardware is in place and power restored to the rack, open the project in Studio 5000 or RSLogix. Confirm that the module appears correctly in the I/O configuration with matching type, slot, and keying. If needed, download the project or re-import the hardware configuration. RockwellŌĆÖs 1756-UM058 manual, as summarized in the research notes, stresses the importance of keeping slot addressing and requested packet intervals within the specified limits for the controller and backplane.
Commissioning tests after replacement
After installation and configuration, you should test every affected channel individually. Ddpartssolution recommends verifying inputs and outputs under both normal and fault conditions where practical. That means operating each sensor or switch and watching the input channel LED and corresponding tag change state, and commanding each output while observing both module LEDs and field-device response.
RealParsŌĆÖ troubleshooting techniques can be reused here. Use your meter to confirm that an energized output now delivers the correct voltage at its terminal, that fuses remain intact under load, and that loads draw realistic current. For analog channels, Control.comŌĆÖs best-practice overview suggests using loop calibrators or reference sources to confirm scaling and stability.
Finally, monitor the system for a period of normal operation. Industrial Automation Co. points out that mis-set I/O update rates or network congestion can cause intermittent dropouts that only appear under full production. Watching diagnostic logs and trend charts in Studio 5000 for a while after replacement helps you catch any configuration mismatch that could shorten the new moduleŌĆÖs life.

Repair versus Replace: Making the Reliability Call
Not every faulty module needs to be thrown away. GES describes repair as the smarter option when failures are minor and localized, such as blown capacitors, damaged connectors, or corroded contacts. Repair makes particular sense when the cost is significantly lower than a new replacement or when the module is legacy hardware that is difficult to source.
However, when a module shows extensive wear, multiple component failures, or repeated breakdowns after previous repairs, GES recommends replacement to achieve long-term reliability. The same applies when module fault codes indicate deep internal failure that the manufacturer marks as unrecoverable.
ACS Industrial and HESCO both highlight the value of professional repair and support networks. ACS offers industrial electronics repair, including Allen-Bradley ControlLogix, with a two-year warranty on completed repairs. RockwellŌĆÖs TechConnect support provides access to experienced engineers and remote troubleshooting tools, which can reduce diagnosis time for complex faults that span multiple systems or protocols.
Electrical Engineering Portal also advocates maintaining spare parts as a reliability strategy, recommending that facilities stock around ten percent of commonly used PLC components as spares and at least one spare CPU and power supply for critical systems. Having a spare I/O module on the shelf turns a failed module from an emergency into a planned swap.

Protecting I/O Modules with Better Power and Maintenance
Power quality, UPS, and surge protection
From a power-systems perspective, one of the best ways to reduce I/O failures is to treat your control power as a critical load. HESCO and Industrial Automation Co. both report repeated faults and intermittent I/O issues in systems with unstable power or overloaded supplies. PLC DepartmentŌĆÖs troubleshooting guide explicitly lists checks of the PLC power supply, UPS, and battery backups as part of basic diagnostics.
For reliability, that translates into designing control circuits with appropriately sized and derated DC power supplies, backing them with industrial UPS systems where outages or brownouts are common, and adding surge suppression on inductive loads as ddpartssolution recommends. RealPars and Amikong also note that semiconductor output modules have limited current capacity, often on the order of a couple of amperes per channel, and should drive heavy or inductive loads through interposing relays to avoid thermal stress and premature failure.
Environmental control and mechanical protection
CoreTigo and GES both show how environmental factors quietly degrade I/O modules. High cabinet temperatures, wide daily temperature swings, and constant vibration accelerate component aging and loosen connections. High humidity encourages condensation, corrosion, and leakage currents that can eventually cause short circuits or phantom signals.
Ddpartssolution suggests keeping control panels within the manufacturerŌĆÖs stated temperature and humidity range, minimizing dust and vibration, and inspecting modules for discoloration, loose terminals, or corrosion. Cooling, filtered enclosures, and vibration isolation are low-cost reliability upgrades compared to the cost of repeated I/O module replacements and unplanned downtime.
Spares, backups, and training
Reliability is about preparedness as much as prevention. Electrical Engineering PortalŌĆÖs recommendation to stock about ten percent of commonly used PLC components as spares gives a practical target. For plants with many Allen-Bradley systems, HESCOŌĆÖs mention of Rockwell AssetCentre for automated program backups is worth taking seriously; recovering quickly from hardware failures depends on knowing exactly what to reinstall.
Training is another recurring theme. The Allen-Bradley ControlLogix troubleshooting course described by ATN and the RealPars digital I/O materials both emphasize building technician skills in reading ladder logic, using Studio 5000 diagnostics, and understanding sinking and sourcing I/O. Well-trained staff are more likely to distinguish between a true module failure and a simple wiring or configuration issue, which reduces unnecessary replacements and speeds real repairs.

Short FAQ
How do I know if an Allen-Bradley I/O module is really bad and not just miswired?
Look for consistency across evidence. When power supplies are within range, wiring and field devices have been verified, configuration and firmware match the hardware, and yet a specific module or channel still shows persistent fault LEDs, missing or stuck signals in Studio 5000, and abnormal electrical behavior under test, multiple sources agree that the module is very likely at fault. Swap tests, where a known-good module or channel behaves correctly in the same slot and wiring, are one of the most convincing proofs.
Can I hot-swap Allen-Bradley I/O modules?
Electric Neutron notes that ControlLogix platforms fully support hot-swap I/O at the hardware level, and RockwellŌĆÖs manuals describe procedures for safe removal and insertion. However, hot-swapping is not universal across all Allen-Bradley families or module types. You must consult the product-specific documentation and consider process safety: even if the hardware tolerates hot-swap, taking an I/O module offline while a machine is in motion can create hazards unless the process is first brought to a safe state.
When should I call in an external repair or support service?
HESCO suggests that in-house teams can typically handle tasks such as replacing faulty I/O cards, swapping batteries, restoring known-good programs, and re-seating cables. You should consider external repair services or Rockwell TechConnect support when multiple systems or protocols are involved, when programs appear corrupted, when major faults persist despite correct wiring and configuration, or when legacy or safety-rated hardware is affected. ACS Industrial and GES both position themselves as partners for diagnosing and repairing modules, especially older or discontinued Allen-Bradley hardware where sourcing new replacements is difficult.
Keeping Allen-Bradley I/O modules reliable is not only about swapping cards faster; it is about treating control power, wiring, and environment as engineered systems. If you approach every I/O fault with a structured diagnostic workflow, protect your I/O with clean, well-supported power and good surge control, and decide repair versus replacement on evidence rather than urgency, you turn I/O ŌĆ£errorsŌĆØ from chronic headaches into manageable, predictable maintenance events.
References
- https://www.atn.org/allen-bradley-controllogix-plc-and-troubleshooting
- https://www.plctalk.net/forums/threads/fault-handling-allen-bradley.68857/
- https://electrical-engineering-portal.com/plc-troubleshooting
- https://blog.hesconet.com/rockwell-automation-plc-troubleshooting-common-problems-and-solutions
- https://www.coretigo.com/how-to-recover-from-an-i-o-module-inefficient-production/
- https://www.electricneutron.com/troubleshooting-guide-for-allen-bradley-plcs/
- https://www.plctechnician.com/news-blog/proactive-maintenance-strategies-plc-io-modules
- https://www.realpars.com/blog/plc-digital-io-troubleshooting
- https://blog.acsindustrial.com/allen-bradley-repairs/3-tips-for-troubleshooting-common-issues-in-allen-bradley-controllogix/
- https://www.amikong.com/Blog/n/io-module-communication-loss-repair


 Videos
 News
News Applications
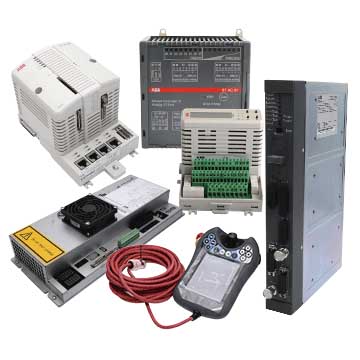


Leave Your Comment